

Knifeless tape turns difficult cuts into clean, paint safe edges that look intentional. Used well, it speeds installs, protects clear coat, and makes complex designs repeatable across vehicles and teams. The goal is not to use more tape, but to place the right tape in the right spot and pull it at the right moment. This guide covers tape types, planning, application, tricky panels, layering, and common fixes so your cuts stay crisp and your seams look factory.
Know your tape and when to use each
Finish Line for everyday seams
Finish Line is the workhorse for color change and printed wraps. It tracks gentle curves, lays predictable arcs, and pulls a stable filament that cuts most cast and polymeric films cleanly. Use it for door breaks, roof edges, and large panel divisions where you want a straight or softly curved seam.
Design Line for tight curves and artwork
Design Line stretches and pivots for sharp radii and S curves. It is ideal for stripes, scallops, and logo shapes that need to turn inside small spaces. Because the filament floats in the carrier, you can steer corners with very little drag. Keep tension low so you do not distort your intended path.
Bridge Line for gaps and panel bridges
Bridge Line spans door gaps and body channels without dropping in. The wider carrier keeps the filament suspended so your cut rides over voids. Use it across sliding door tracks, between doors and quarters, and over corrugations on box bodies where you want film to bridge cleanly.
PPF dedicated lines
PPF specific tapes carry a filament tuned for thicker films and top coats. They help avoid micro jag or ragged edges on urethane. If you install both vinyl and PPF, keep these spools separate and label them so no one reaches for the wrong line mid job.
Planning is the difference between clean and messy
Draw the seam before you lay tape
Look for factory breaks, shadow lines, and edges that the eye already accepts. A seam that follows a character line disappears. A seam that cuts across a panel looks like a mistake. Trace the route with a water soluble pencil, step back, then adjust until the line feels natural.
Give the filament room to start and finish
Leave at least two centimeters of free filament at both ends. Tuck the starting tail under the carrier so it does not snag during squeegeeing. Plan an exit into waste film, not into a visible face. A clean exit avoids micro nicks at the edge.
Think in layers
If your design stacks colors or textures, plan the order. The bottom color gets taped first. Overlapping colors get their own tape lines so each cut is isolated. This stops the filament from dragging through multiple layers and creating a fuzzy edge.
Laying tape that tracks straight
Clean the substrate with IPA and dry it well. Oils under the carrier make the tape wander. Unroll short sections while holding the spool in line with the route. Anchor every 20 to 30 centimeters with a light squeegee pass. For tight turns, place tiny relief bends in the carrier rather than pulling hard. Hard tension stores energy that snaps back and shifts your path.
Using reference tools
A ruler or flexible batten helps set perfectly parallel lines for dual stripes. For roof and hood stripes, mark a centerline with low tack tape and measure equal offsets on both sides. Perfect mirror spacing is more convincing than perfect stripe width.
Wrapping over tape without moving it
Float the film over the carrier rather than dragging it. A light mist of slip on the film face helps the squeegee glide. Work from the middle of the tape outward with small, overlapping strokes. Keep pressure even so you do not push the carrier into gaps. On deep channels, pre heat the film away from the tape, then relax it into the recess with a felt card. If you feel the carrier telegraphing through, back up and reduce pressure.
The pull that makes perfect edges
Temperature and timing
Pull when the film is set but not locked. The sweet spot is after the panel is fully laid and lightly squeegeed, before heavy post heat. If the film is scorching hot, adhesives smear. If it is cold and stiff, the filament fights. Aim for a warm, relaxed surface.
Pull angle and speed
Hold the carrier flat to the surface and pull the filament back over itself at about 170 degrees. This keeps the cut straight and prevents adhesive lift. Pull in a smooth, steady motion. Fast, jerky pulls can chatter the edge. If you feel snagging, pause, reflatten the carrier, and continue.
Peel the waste in the right direction
Remove the surplus film by peeling it back over itself, not straight up. This reduces stress on the new edge. Follow with a gentle squeegee pass to seat the edge, then a light warm pass to relax micro tension.
Complex panels and how to handle them
Bumpers with deep returns
Plan a two piece approach. Use Finish Line along the natural break and add a short Design Line segment to turn tight inside corners. Do not force one line to do both jobs. After cutting, add a small inlay on the hidden return if needed so the visible face stays tension free.
Mirrors and tight radii
Design Line shines here. Run the line along the seam where the cap meets the base. Avoid severe stretching over the carrier. Make short relief cuts in the film away from the seam, not across it, so the cut edge remains smooth.
Rivets and corrugations on box trucks
Bridge Line prevents the carrier from sinking into valleys. Lay the line across peaks, float the film, and squeegee the peaks first. Pull, then work film into valleys with heat and a soft wheel. This sequence keeps the cut on the high plane where eyes read edges.
Printed wraps and artwork alignment
When artwork crosses doors, tape both sides of the gap so the filament cuts clean on each panel. Set alignment ticks in the bleed that straddle the seam. After you cut and remove waste, the ticks help register the second panel to the first. This reduces drift and preserves logos across gaps.
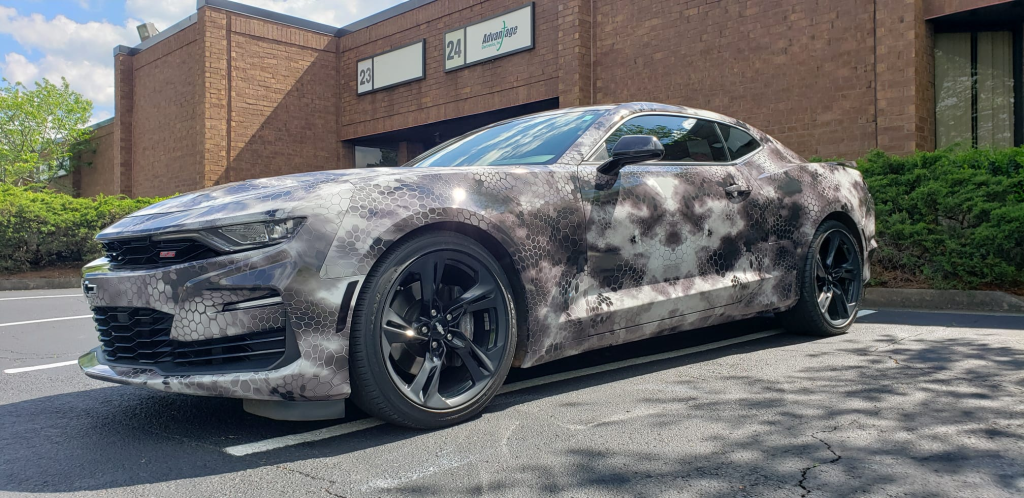
Stripes and accent graphics
For dual stripes, lay two Design Line runs with a measured gap. Use a small scrap of film as a spacer so the gap stays consistent through curves. Pull the inner filament first, remove the center waste, then lay the color fill into the channel you created. Pull the outer filaments last to finish. This sequence produces razor parallelism and prevents wandering.
Layering finishes without frayed edges
When stacking gloss and satin, cut each layer with its own tape line. Do not attempt to cut through both at once. After the first pull, warm and seat the edge, then lay the second film. A second pull isolates the top layer and preserves a crisp reveal between finishes.
Troubleshooting common issues
Ragged or fuzzy edge
Check filament type against the film. Some thick textures need a sharper line. Slow your pull and increase the back angle. Replace any tape that feels old or dried out.
Micro lift after the pull
Seat the edge with a firm felt pass while the surface is warm. Follow with post heat to the recommended range. If the gap is forward facing, a small run of edge sealer may be prudent.
Filament breaks inside the carrier
Stop and do not yank. Lift a corner of the carrier carefully to expose the filament. Grab it with fine tweezers and continue the pull. If retrieval fails, set a new tape line offset by a millimeter and re cut. Clean away the orphaned carrier with patience.
Paint nick risk from knives
If you must trim after the pull, use a new blade and a double card technique. Place a hard card as a guard, then glide the blade along the card face. Better yet, rethink your tape placement next time so the pull finishes the job.
Post heat and finishing that lasts
After all pulls, inspect seams under bright light. Warm edges to the film maker’s post heat range, especially on stretched zones. Post heat resets memory and reduces creep. Wipe with a clean microfiber to remove carrier residue. If a vehicle is leaving the same day, advise the owner to avoid aggressive washing for a few days so adhesives finish settling.
Shop habits that raise consistency
Store tapes in sealed bags away from heat so carriers do not dry. Date each roll with a marker. Retire rolls that feel stiff or chalky. Keep a small board in the bay with short samples of each line and notes on where your team likes to use them. Train new installers on scrap panels first so they learn pull angles and timing before touching customer cars.
Quoting time for knifeless work
Design heavy jobs with many seams and stripes take longer. Quote for layout and tape time just as you do for disassembly and post heat. Clients understand the value when you explain that knifeless tape protects paint and produces factory looking edges. A small line item for paint safe cutting helps them see the craft in your process.
The practical takeaway
Choose the right knifeless tape for the route, place it with a calm hand, float film rather than forcing it, and pull warm with a generous back angle. Plan seams where the vehicle permits, isolate layers so each cut stays sharp, and post heat so edges hold. With those habits, your cuts read clean to the eye, your seams look intentional, and your installs return with compliments instead of callbacks.